
Don’t Skip This Step When Planking, Piking and Crunching
Originally Written By: Alex Allan | ![]()
![]()
Core training is an exercise trend that is here to stay. People everywhere are planking, piking and crunching with the best of intentions, limited only by imagination. There is only one problem: Many workout enthusiasts seen precariously planking on exercise balls may have missed a step.
We live in a society that breeds tight hips and sleepy abs. Seated workdays followed by couch flopping offer little stimulation to our dormant core muscles. Add hours of sleep curled up in the fetal position and we are cruising toward a nationwide epidemic of shortened hip muscles and abdominal amnesia.
Research tells us the first and most crucial stage of core stability training is learning to stabilize the abdominal wall. Jumping right to intermediate core exercises has become the “in” thing to do, but this can lead to injury if your abs are checked out.
Just as a light bulb flickers when the electric current between wires isn’t strong enough, the mind-to-muscle relationship is no different. The less you use certain muscles, the harder it is for your brain to recruit them. This is the missed step. When the deep abdominals aren’t being properly activated during core exercises, other muscles in the hips, neck, shoulders and lower back end up doing the bulk of the work.
If the abdominals are the flickering light bulb, then the tight hip muscles are a giant spotlight. Because these muscles are constantly active while sitting, standing and walking, they are quick to switch on when needed. In exercises like planks, pikes and leg raises, tight hip and leg muscles can compensate for the weak, putting stress on the lower back.
But there is a way to improve.
In sports, champions turn weak points into their strongest qualities through consistent hard work. In life, it should be no different. It’s time to take control of your core by using the four tips below.
RELEASE IT
Tight hip muscles can dominate many useful core stability exercises and often create unwanted tension in the lower back. According to the National Academy of Sports Medicine, stretching or using a foam roller to release pressure points on muscles that you don’t want to be active is an essential step to facilitate better access to the muscles you do want to use.
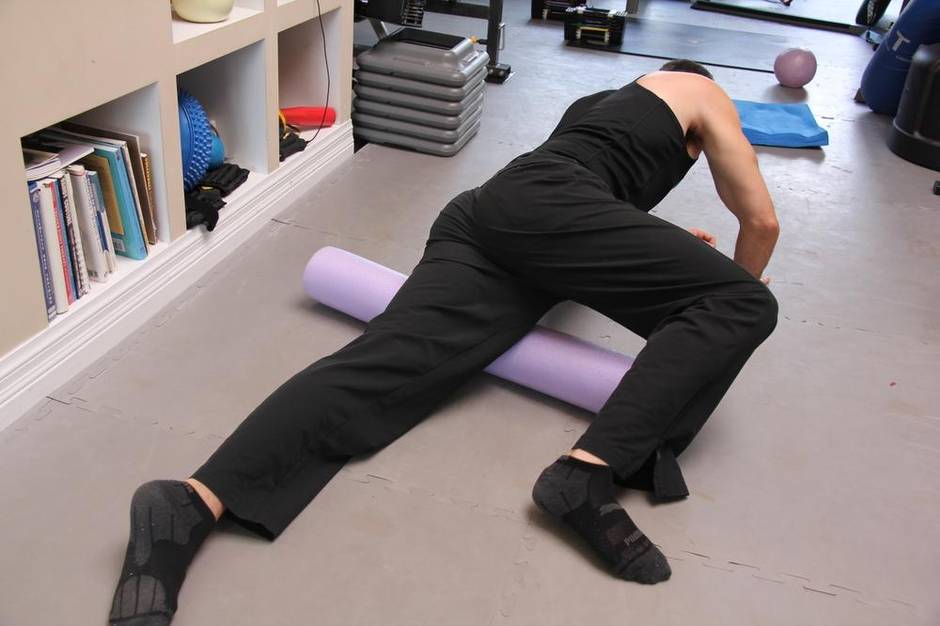
Do this: Try a 30-second stretch and foam-roller release of these thigh/hip muscles before you do core work to relax the thighs and release tension in the low back. While lying on your side, place the roller under the top of the thigh, approximately four inches down from the hip crest on the bottom leg. Use the top leg to regulate pressure on each sore spot you find. When you find a sore point, hold it for 30 seconds, then roll down and out to find more spots. The sensation should be of mild discomfort and not significant pain.
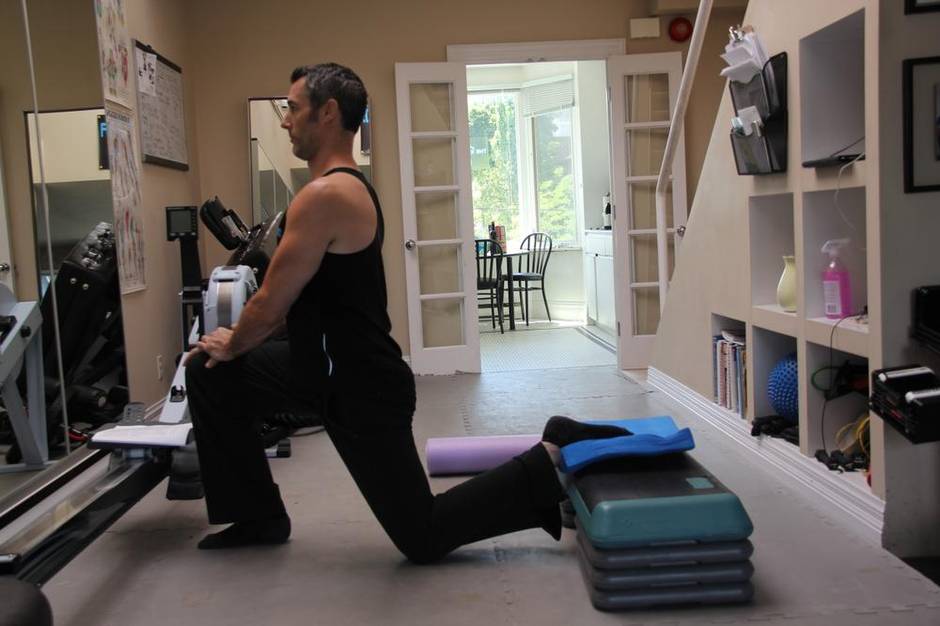
This hip stretch is also beneficial: With rear foot elevated, keep hips under ribs, shift the front knee forward and sink the hips down as the body moves forward and the spine stays tall. Hold for 30 seconds.
FIND IT
By combining techniques from the Princeton Medical Exercise department and Robertson Training Systems, you can apply this easy method of locating your deep core muscles. Finding and palpating these muscles provides important sensory feedback to the brain that can make contracting the muscle easier and ensure you are activating the proper muscles.
Do this: To locate your deep core muscles, do the Supine Finger Test. While lying face up, place two fingers on the bones on the front of your hips. Move your hands in an inch toward your belly button and down an inch toward your toes. You should now be directly over the deep abdominal muscle. Gently press your fingers in and then pull the skin on both sides away from your belly button until you feel a stretch sensation. Next, try to squeeze your stomach to meet the pressure of the stretch you just created. You should feel a gentle tightening under your fingers, as if you took in your belt one extra notch. If the muscles under your fingers start to “dome,” then you are contracting too much, tilting your pelvis and compensating with larger muscle groups.
ACTIVATE IT
If squeezing your abdominals is as familiar to you as space exploration, you’ll benefit from this tip from low-back guru Dr. Stuart McGill.
Do this: To use the Bicep Method, McGill suggests holding the arm up and flexing the bicep like a body builder until you can feel tension in both sides of the arm. Then try to recreate the same feeling in the stomach by bracing the abs like a brick wall. You should feel healthy tension in the lower back in the same way you feel tension in the back of your arm when you flex the front. With your other hand, follow the instructions from step 1 and see if you can feel your abs contract.
INTENSIFY IT
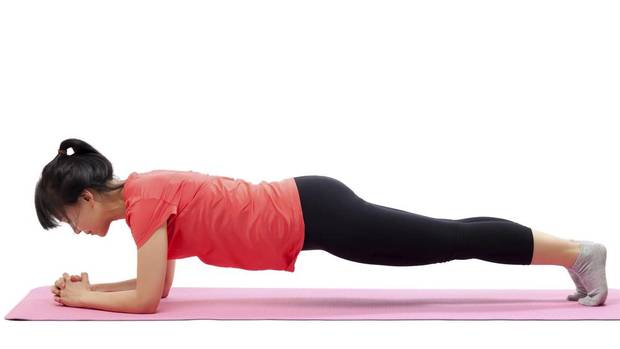
Once you’ve mastered the above techniques, you’ll be ready to plank. But even then, you shouldn’t let awareness of your core wane. A new study in the Journal of Strength and Conditioning Research showed that squeezing the butt muscles and rolling the shoulders away from the ears during the plank increased the activation in the core.
Do this: Apply these principles to the plank from the knees. The reason for this is to avoid the quads by not allowing leverage from the toes. To make the kneeling plank harder, the elbows are pushed into the mat and pressure is applied toward the stomach. The elbows don’t move but this “pulling in” action makes it harder on the abs. Also the bum squeezing and shoulder setting make the kneeling plank more challenging. Do this in six- to 10-second holds. This will take your leg muscles out of the equation, creating more opportunity to strengthen your abs.
Health Advisor contributors share their knowledge in fields ranging from fitness to psychology, pediatrics to aging.